We bought an RV travel trailer with full intentions of renovating it. I watched the Facebook Marketplace for months waiting for just the right one; then pounced the moment I found one in our price range.
After sending Colby and my dad to KANSAS to pick it up, I kept staring at the pictures in the listing trying to visualize everything I wanted to do to it.
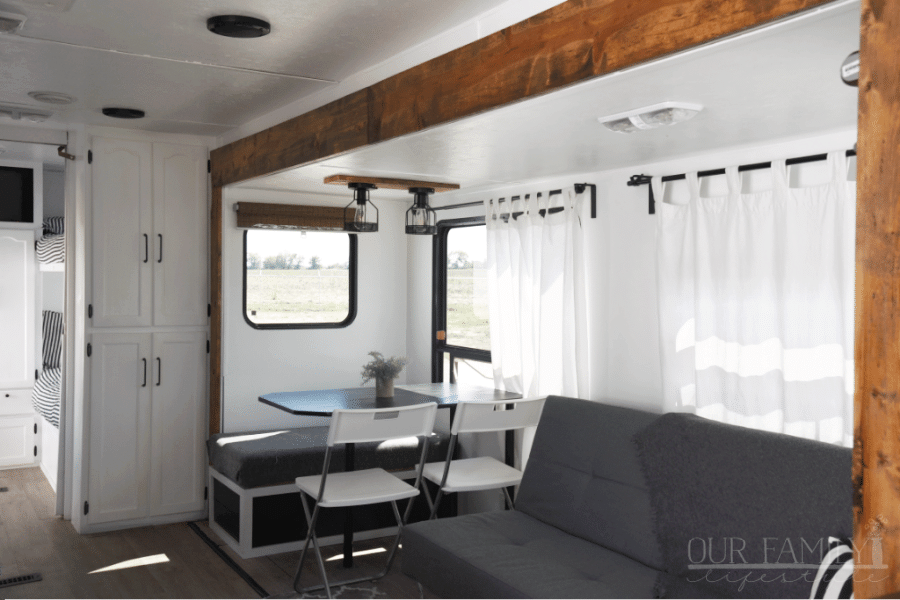
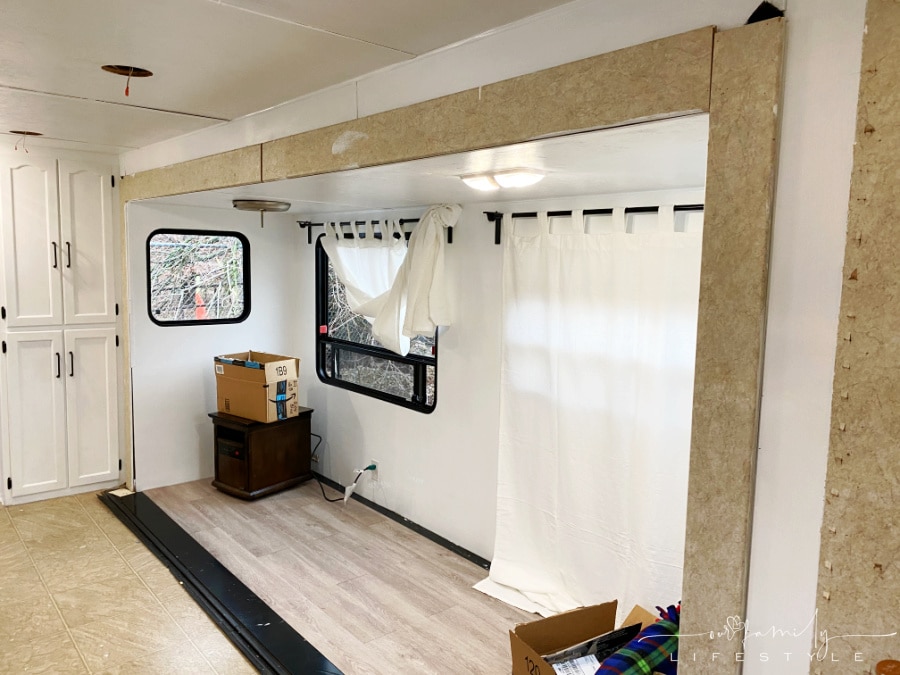
The very first thing I noticed was an opportunity to add faux wood beams similar to the ones in our kitchen. Well, not beams really, but at least wood trim to look sort of like beams.
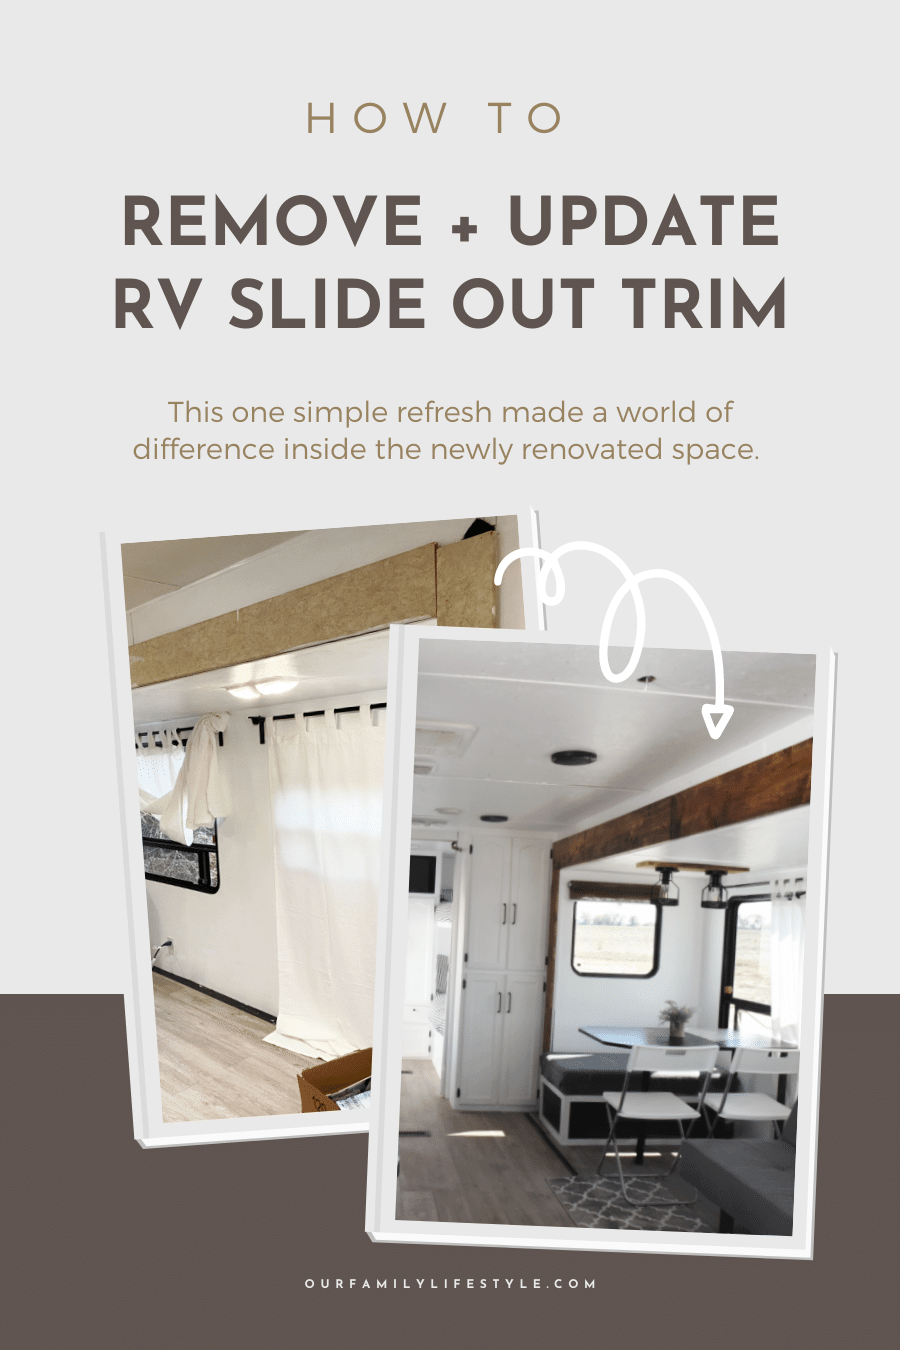
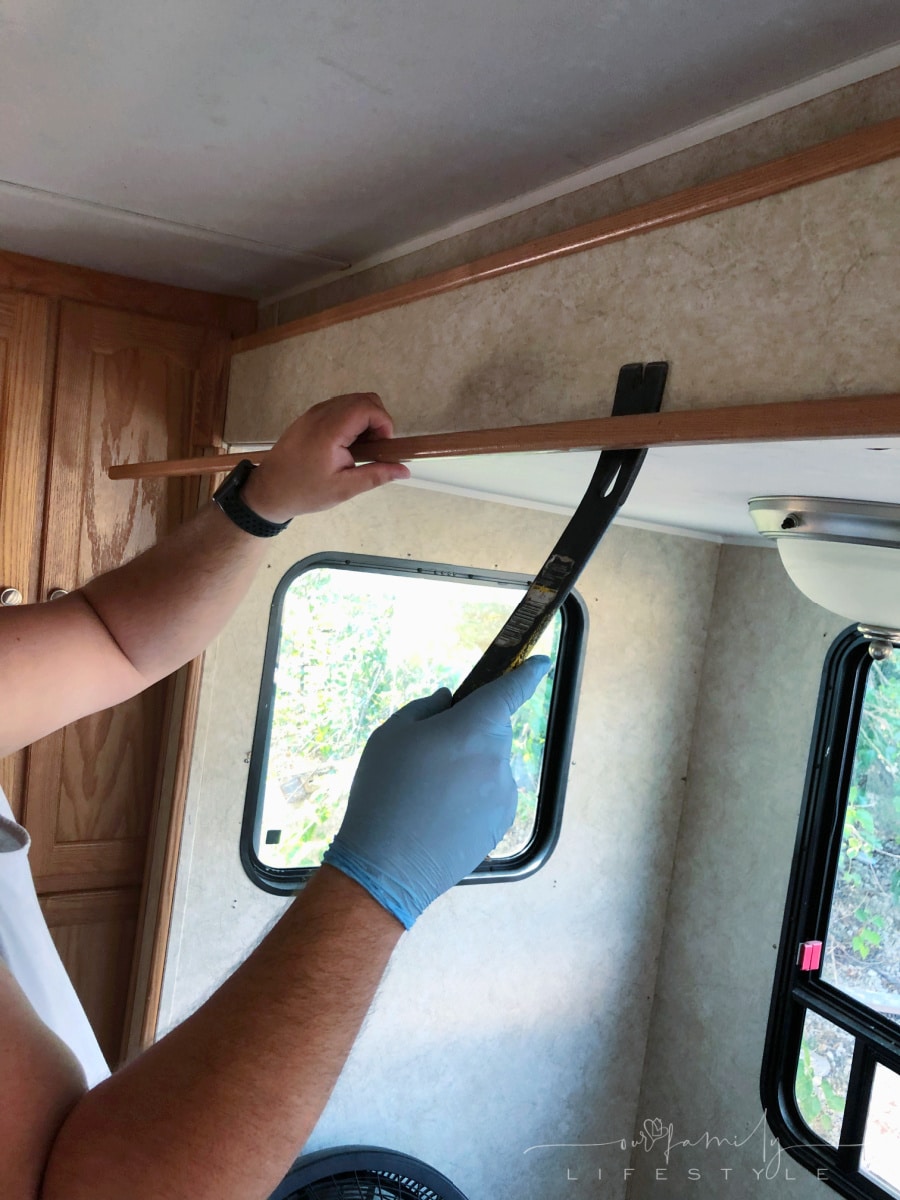
Therefore, removing the trim around the slide out was one of the first projects we tackled. I was absolutely sure it had to go.
We're fortunate in the fact that our model only had a thin piece of slide out trim moulding around the outer edge with design caps on the corners and in the middle.
All of this was easily removed using a pry bar and a hammer and took little time or effort considering the rest of the jobs during the RV renovation.
Next, it was time to prepare the wood. We pre-measured and cut each side piece (we left the header piece uncut for now) according to the slide out measurements and then got to work.
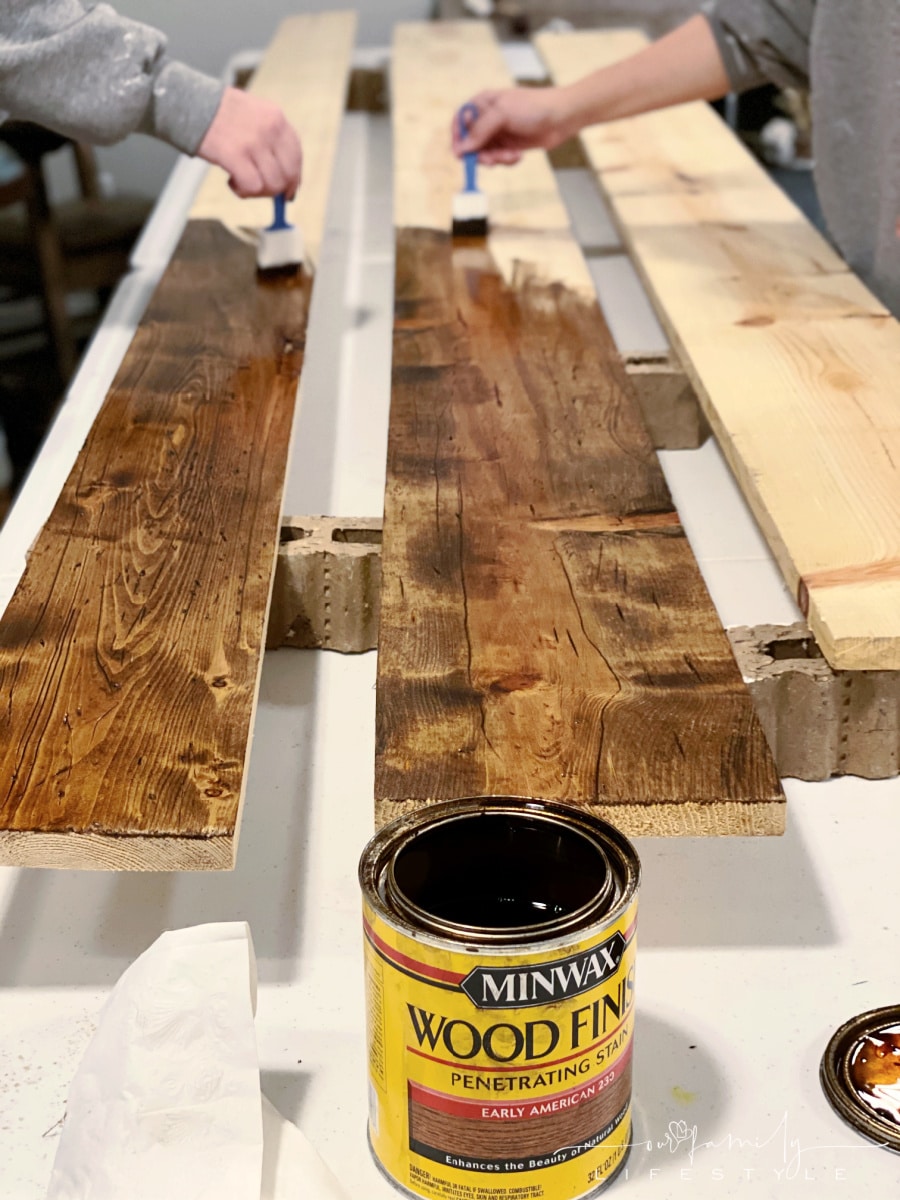
Just as we did for our faux beams at home, we used a screwdriver, chicken wire and garden tools to create a distressed look over each piece of wood.
Once we achieved the look we wanted, we began my favorite part: staining! I love watching the colors of the grain and every notch in the wood begin to come alive.
Yes, I realize I can be a strange one.
Anyways, just as I did in our house, I chose Minwax Early American for the wood stain.
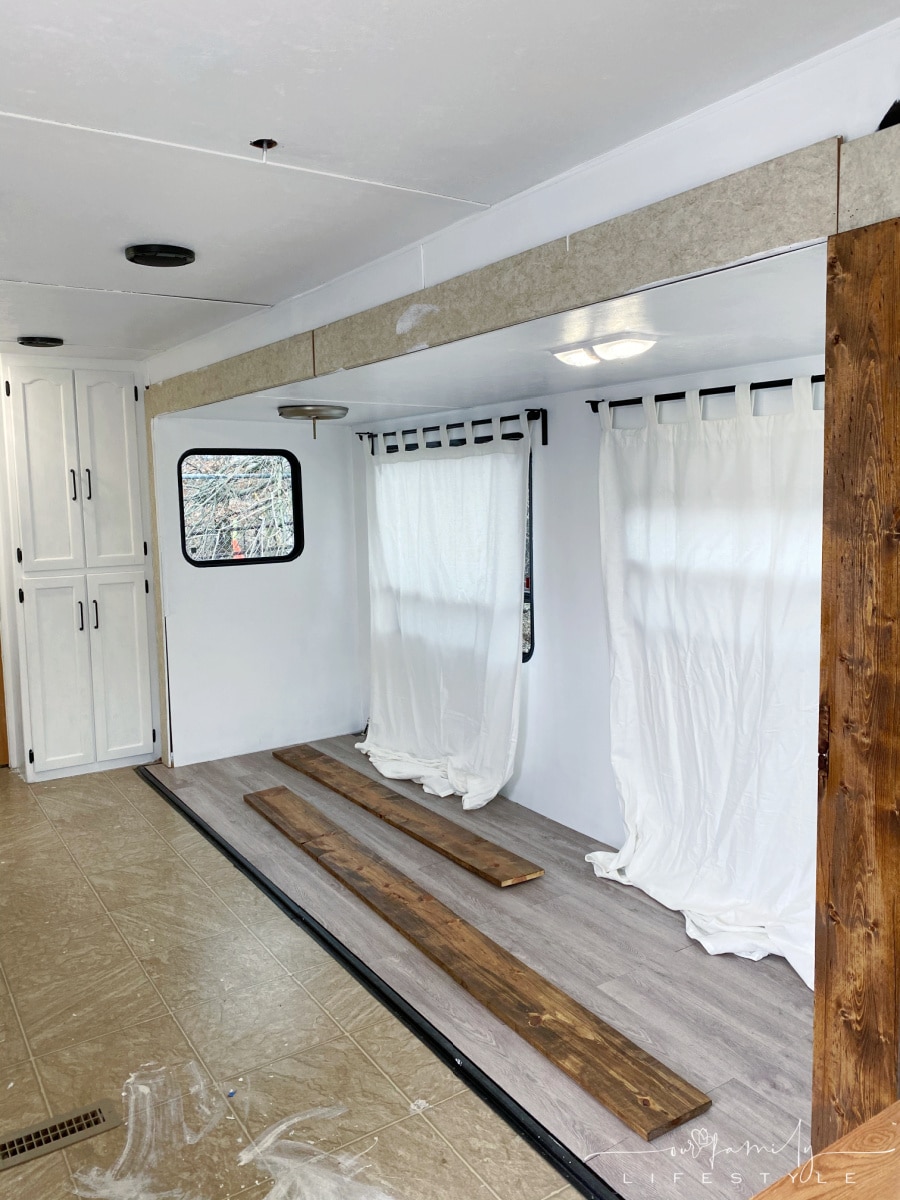
After letting it completely dry, we stored the pieces of wood trim in the trailer for a few days to acclimate before hanging.
After painting the slide out and all of the main area, we were ready to hang the trim.
We started with a generous application of Liquid Nails on the back of each piece of wood. (We did prep the surface underneath by lightly sanding and cleaning before gluing).
Starting on the sides, we glued, then nailed, the trim pieces to the slide out, ensuring the trim was flush with the inside of the slide out.
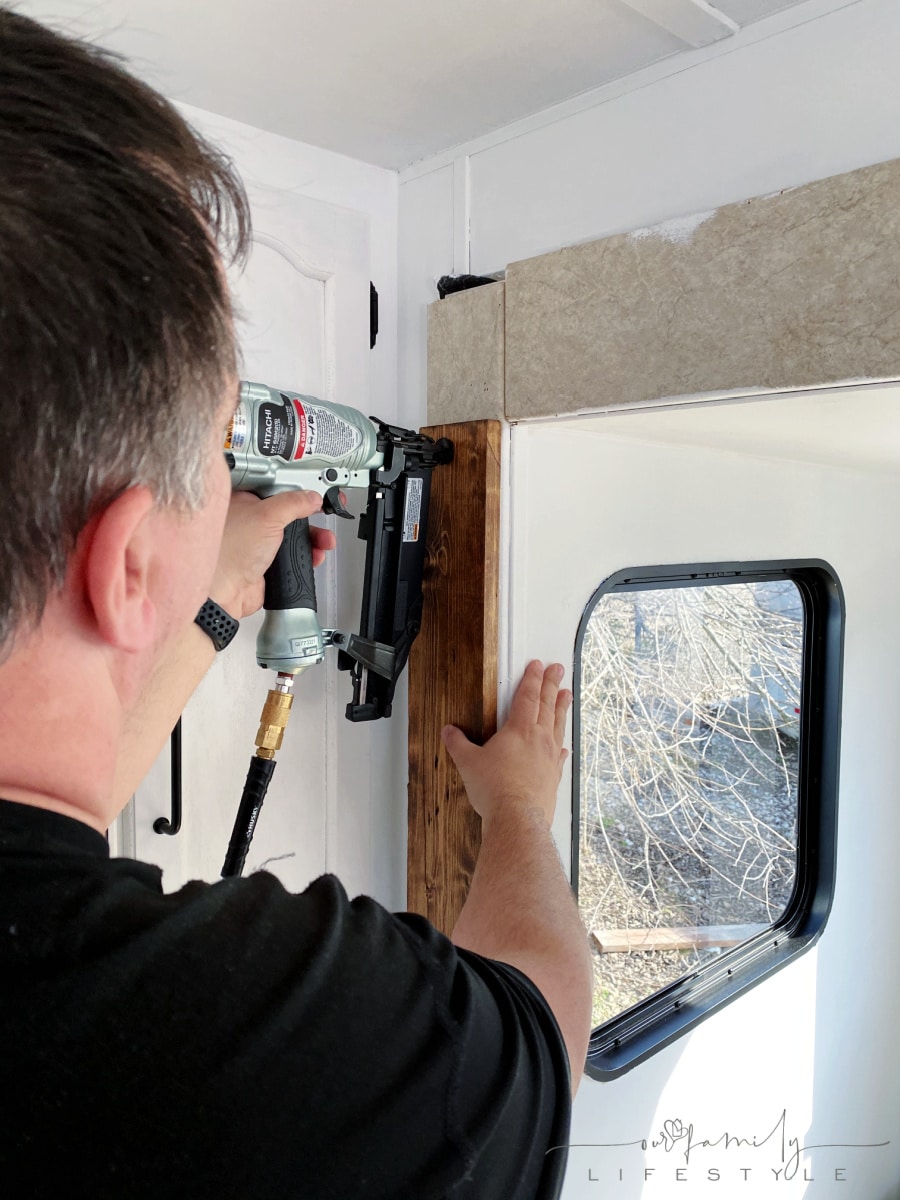
For the header piece, we wanted to make sure it lined up perfectly atop the two sides and went flush with the other edge of each.
Only after fitting the header across the full length of slide out did we measure and cut. Then we hung it.
We did find that the center of the header required a bit more glue and ⅓" longer nails to firmly stay in place. The shorter nails simply weren't catching in the middle of the slide.
Once we finished there was nothing left to do but take a step back and admire our work.
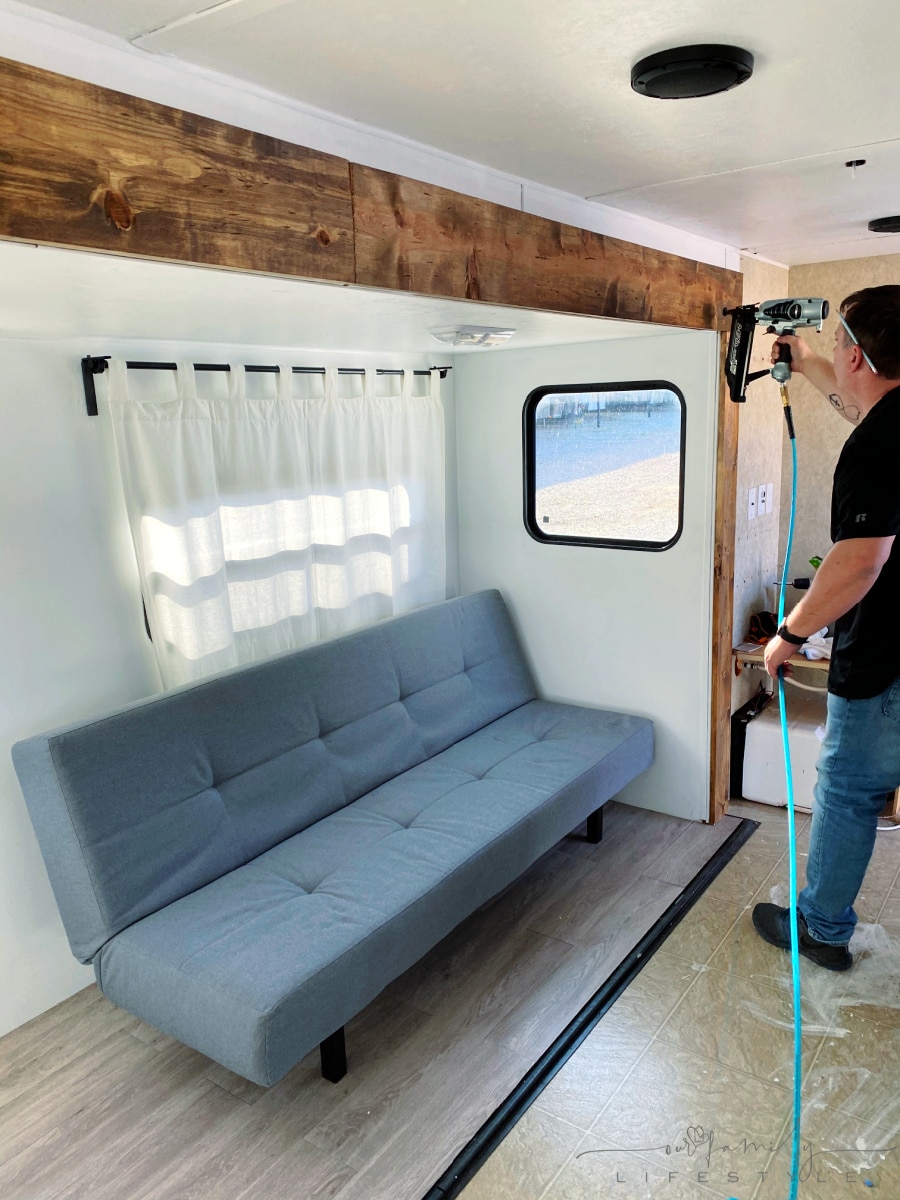
Just as the faux beams in our house changed the entire look of our kitchen, the wood trim completely changed the look of our travel trailer.
This one simple refresh of trim made a world of difference inside the newly renovated space.
amzn_assoc_placement = "adunit0"; amzn_assoc_search_bar = "true"; amzn_assoc_tracking_id = "7onashoe-20"; amzn_assoc_ad_mode = "manual"; amzn_assoc_ad_type = "smart"; amzn_assoc_marketplace = "amazon"; amzn_assoc_region = "US"; amzn_assoc_title = "Shop This Post"; amzn_assoc_linkid = "90b639bf19adeb794e16108b1fc21341"; amzn_assoc_asins = "B000NPT67K,B083GP9CXC,B000LNWHAW,B00NOHNCJM";
- How to Make DIY Distressed Faux Beams
- How to Demo an RV Travel Trailer for Renovations
- Repurpose Your RV Dinette Bench and Table Set
- How to Prep and Paint RV Walls and Cabinets
- RV Travel Trailer Remodel :: Before and After