Have you ever spent hours in the kitchen, meticulously following a biscuit recipe only to end up with dense, flat hockey pucks instead of the light, fluffy clouds of goodness you were hoping for?
We've all been there, my friends.
But fear not, because today, I am about to share with you the ultimate secret to achieving perfectly fluffy Bisquick biscuits every single time.
Bisquick Biscuits Made Easy
Yes, you heard it right — every time!
There's something truly magical about sinking your teeth into a warm, buttery biscuit that practically melts in your mouth.
It's a comfort food like no other, evoking memories of lazy Sunday mornings and cherished family gatherings.
But mastering the art of biscuit-making can be a frustrating and elusive pursuit. That is until you discover this game-changing secret.
Now, you might be thinking, "What could possibly be the secret to achieving biscuit perfection?"
Well, my dear reader, it lies in a simple technique that has been passed down through generations of biscuit enthusiasts.
And that secret is all about the way you handle the dough.
But before we dive into the nitty-gritty details, let's take a step back and explore the world of Bisquick biscuits and why they hold a special place in our hearts.
The Allure of Bisquick Biscuits: A Comforting Classic
There's something undeniably comforting about a warm, freshly baked biscuit.
The golden exterior, the tender crumb, and the buttery aroma fill the kitchen — it's a simple pleasure that never fails to bring joy.
And when it comes to biscuits, Bisquick has long been a beloved go-to for home cooks and bakers alike.
Bisquick biscuits have a special place in our hearts for several reasons.
First and foremost, they're incredibly easy to make.
With just a few simple ingredients and a box of Bisquick mix, you can whip up a batch of biscuits in no time.
This makes them perfect for busy mornings or impromptu brunches with friends.
But convenience isn't the only reason why Bisquick biscuits are so popular. They also deliver on taste and texture.
When prepared correctly, these biscuits are light, fluffy, and oh-so-delicious.
They have just the right amount of buttery richness and a subtle tang that keeps you coming back for more.
Understanding the Science Behind Fluffy Biscuits
Before we delve into the secrets of making perfect Bisquick biscuits, let's take a moment to appreciate the science behind their fluffy texture.
The key lies in two main factors: leavening agents and gluten development.
Bisquick contains baking powder as its primary leavening agent.
When combined with liquid and heat, baking powder releases carbon dioxide gas bubbles that create lift in the dough.
This is what gives biscuits their characteristic height and lightness.
In addition to leavening agents, gluten development plays an important role in biscuit texture.
Gluten is formed when flour comes into contact with liquid and is then agitated through mixing or kneading.
However, when it comes to biscuits, we want to minimize gluten development to avoid a tough and chewy texture.
That's why it's important to handle the dough with care, as we'll discuss later.
The Key Ingredients for Perfect Bisquick Biscuits
Now that we understand the science behind fluffy biscuits, let's talk about the key ingredients that make Bisquick biscuits so irresistible.
The beauty of using Bisquick mix is that it already contains most of the necessary ingredients in just the right proportions.
Here's what you'll need:
- Bisquick mix: This is the star of the show. It combines flour, shortening, leavening agents, and a touch of salt to create a versatile base for all your biscuit creations.
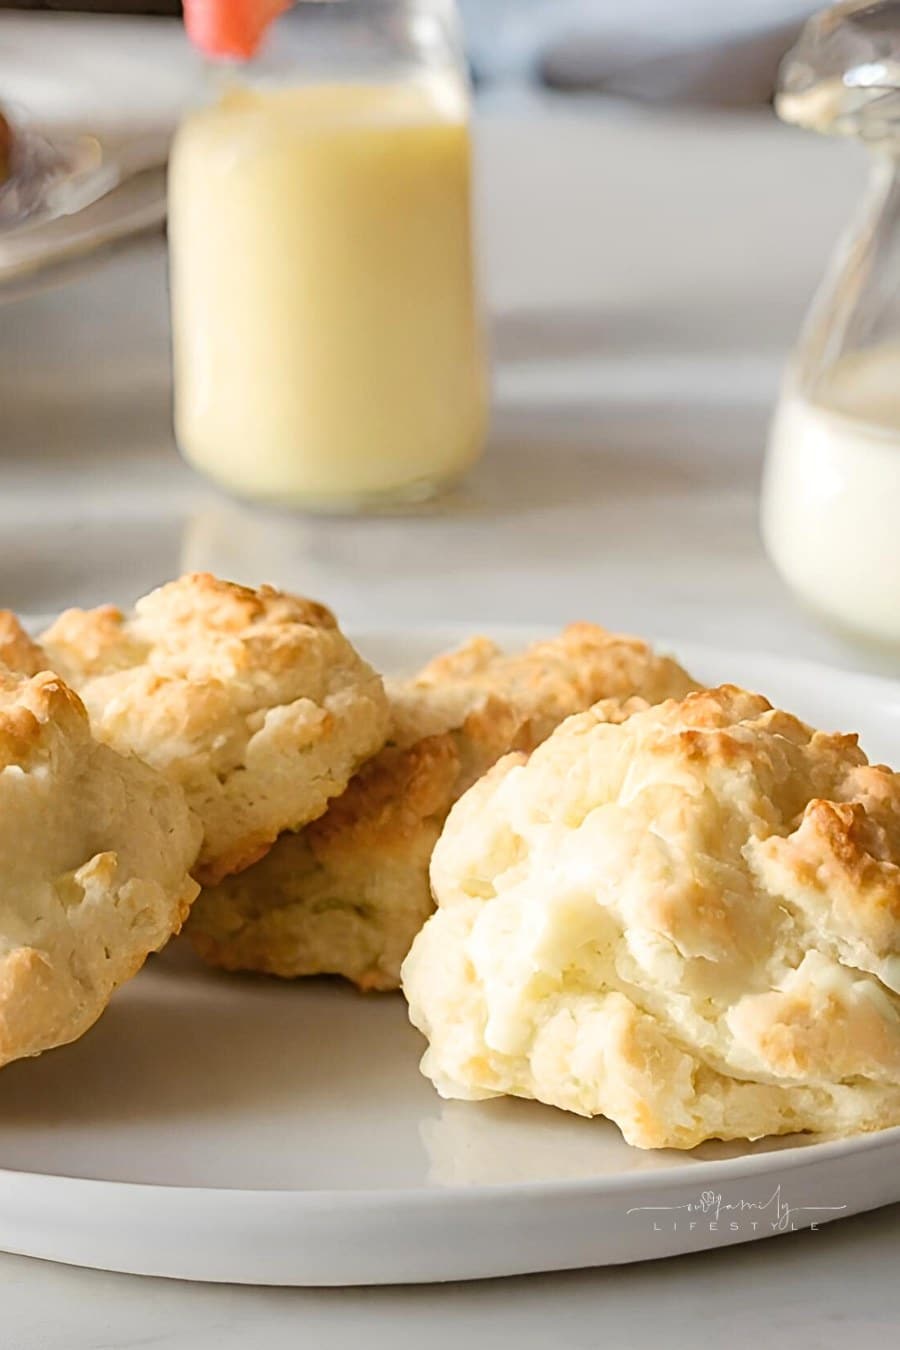
- Milk: Bisquick biscuits require liquid to bring the dough together and activate the leavening agents. Milk is commonly used for its richness and flavor.
And, while not necessary, adding a pat of butter on top of each biscuit before baking can enhance both flavor and appearance.
That's it! With just two simple ingredients, you're well on your way to biscuit perfection.
The Importance of Properly Measuring Your Ingredients
When it comes to baking — especially with something as delicate as biscuits — precision is key. Accurately measuring your ingredients ensures consistent results every time.
Here are a few tips for measuring your Bisquick mix:
- Use dry measuring cups: When measuring out Bisquick mix, be sure to use dry measuring cups rather than liquid ones. This will ensure that you're getting an accurate amount without any excess or shortage.
- Level off the top: After scooping the Bisquick mix into the measuring cup, use a straight edge (like the back of a knife) to level off the excess. This helps prevent too much mix from being added to your recipe.
- Avoid packing: Unlike flour, which benefits from being lightly packed into the measuring cup, Bisquick mix should not be packed down. Simply spoon it into the cup and level it off.
By following these simple measuring tips, you'll be on your way to perfectly portioned biscuits every time.
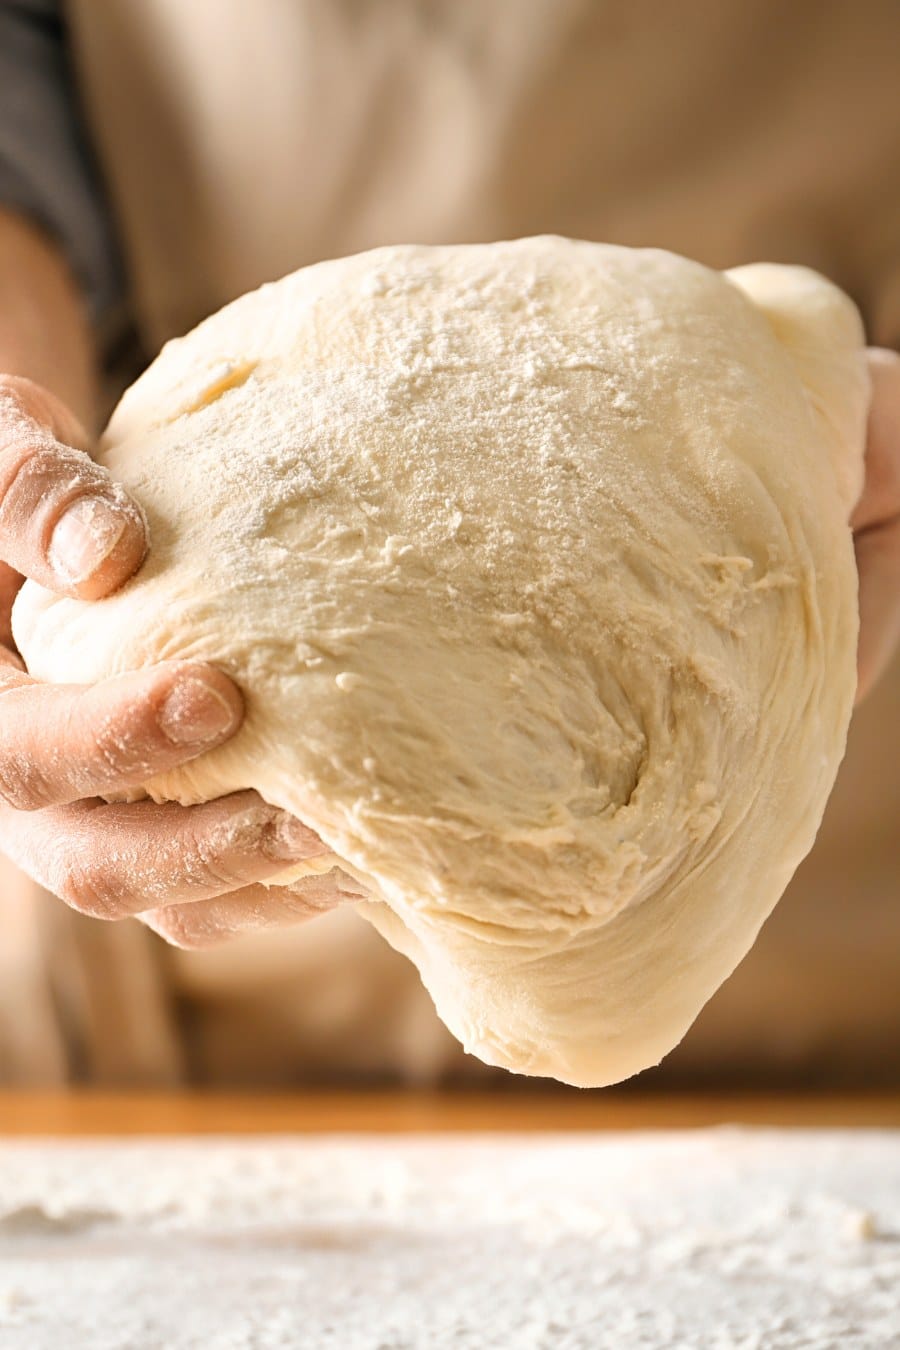
The Art of Handling the Dough: Tips and Tricks
Now that we've covered the basics, let's dive into the secret behind achieving light and fluffy Bisquick biscuits — handling the dough with care.
The way you handle and shape your biscuit dough can make all the difference in texture and rise.
Here are some tips and tricks to keep in mind:
- Mix gently: When combining the Bisquick mix and milk, avoid overmixing. Stir just until everything comes together into a shaggy dough. Overmixing can lead to tough biscuits.
- Knead sparingly: Once you've turned out your dough onto a floured surface, knead it gently just a few times to bring it together. Again, be careful not to overwork the dough.
- Pat or roll: Depending on your preference, you can either pat or roll out your biscuit dough. Patting is more traditional and results in a rustic appearance with slightly uneven edges. Rolling creates more uniform biscuits with smooth edges.
- Drop or cut: Bisquick biscuits can be either dropped or cut. With the dropping method, you drop spoonfuls of the dough onto a baking sheet; whereas the cutting method involves rolling out the dough and using a biscuit cutter to create individual pieces before baking.
Remember, less is more when it comes to handling biscuit dough. The goal is to create layers of buttery goodness without developing too much gluten.
Prepping Your Oven: The Secret to Even Baking
While the dough is resting, it's time to preheat your oven. Achieving even baking is crucial for perfectly golden and fluffy Bisquick biscuits.
Here's what you need to do:
- Preheat your oven: Set your oven to the specified temperature in the recipe. This allows the oven to reach the desired heat before you put in your biscuits.
- Position the rack: For best results, place the oven rack in the center position. This ensures that heat circulates evenly around the biscuits, preventing any uneven browning or undercooking.
By properly preheating your oven and positioning the rack, you'll create an optimal baking environment for your biscuits.
Baking Time and Temperature: Finding the Sweet Spot
The baking time and temperature can vary depending on your specific recipe and desired biscuit texture.
However, there are some general guidelines to keep in mind:
- Bake at a high temperature: Most Bisquick biscuit recipes call for a high oven temperature, typically around 425°F (220°C). This helps create a quick rise and golden exterior.
- Watch for doneness: Biscuits are done when they're golden brown on top and no longer doughy in the center. The exact baking time can range from 10 to 15 minutes, so keep a close eye on them.
Remember that every oven is different, so it may take some trial and error to find your perfect baking time and temperature.
But once you do, it's smooth sailing from there!
The Ultimate Test: How to Tell When Your Biscuits Are Ready
So, how do you know when your Bisquick biscuits are perfectly baked and ready to be devoured?
Here are a few telltale signs:
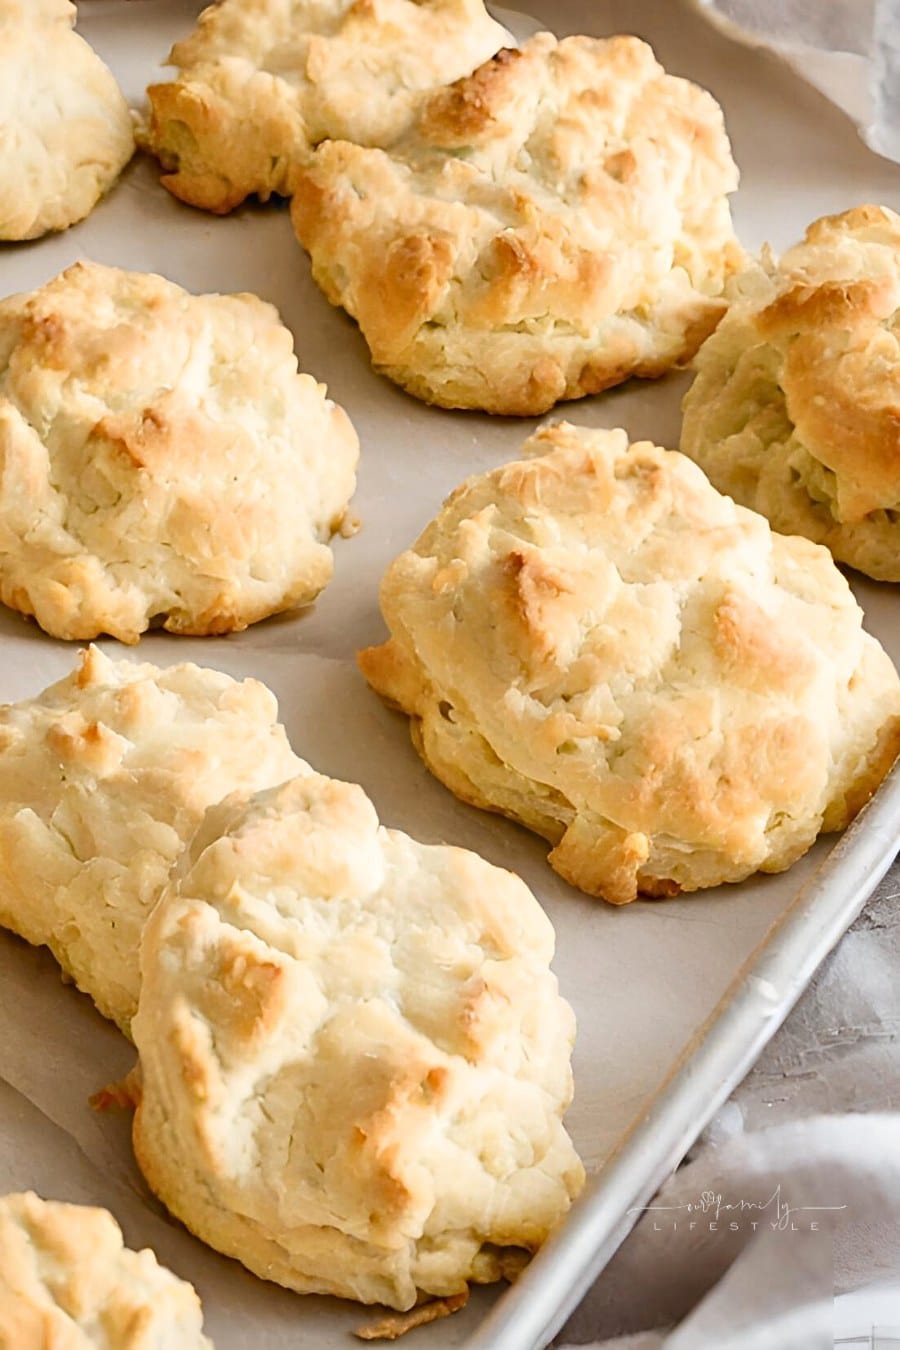
- Golden brown color: The tops of the biscuits should be a beautiful golden brown hue. This indicates that they've been baked to perfection.
- No doughy center: Gently press the center of a biscuit with your finger. If it springs back and feels firm, it's done. If it leaves an indentation or feels doughy, give them a few more minutes in the oven.
Once your biscuits pass these tests, it's time to enjoy the fruits of your labor!
Enjoying the Fruits of Your Labor: Serving and Storing Perfect Bisquick Biscuits
Congratulations! You've successfully mastered the art of making fluffy Bisquick biscuits.
Now, it's time to savor every bite!
Here are some serving suggestions and storage tips:
- Serve warm: Bisquick biscuits are best enjoyed fresh out of the oven while they're still warm and fragrant. Serve them alongside scrambled eggs, bacon, or your favorite breakfast spread.
- Store leftovers properly: If you have any leftover biscuits, allow them to cool completely before storing them in an airtight container or resealable bag. They can be kept at room temperature for up to two days or refrigerated for a longer shelf life.
- Reheat with care: To reheat leftover biscuits, preheat your oven to 350°F (175°C). Place the biscuits on a baking sheet and warm them for about 5 minutes until heated through. Avoid microwaving as it can make the biscuits soggy.
Now that you know the secrets to making perfect Bisquick biscuits, you can confidently whip up a batch whenever the craving strikes.
Whether it's for a cozy breakfast at home or a special occasion brunch, these fluffy delights are sure to impress.
So go ahead, grab your apron, and get ready to enjoy biscuit bliss!
Bisquick Biscuits FAQs
How do you make biscuits with Bisquick?
Making biscuits with Bisquick is incredibly easy. Simply follow these steps:
- Preheat your oven to 425°F (220°C) and position the rack in the center.
- In a mixing bowl, combine 2 1/4 cups of Bisquick mix with 2/3 cup of milk. Stir until just combined.
- Turn the dough out onto a floured surface and knead it gently a few times to bring it together.
- Pat or roll out the dough to your desired thickness (usually around 1/2 inch).
- Cut out biscuits using a round biscuit cutter or a drinking glass dipped in flour.
- Place the biscuits on an ungreased baking sheet, spacing them about an inch apart.
- If desired, brush the tops of the biscuits with melted butter for added flavor and shine.
- Bake for approximately 10-12 minutes or until golden brown on top and no longer doughy in the center.
And there you have it — delicious homemade biscuits made with Bisquick!
Why do the center of my Bisquick biscuits always seem to be undercooked I follow directions and have good outside browning I would like the center to be more fluffy?
If the center of your Bisquick biscuits always seems to be undercooked while the outside browns nicely, there are a few possible reasons:
- Thickness: The thickness of your biscuit dough can affect the baking time and evenness of cooking. If your biscuits are too thick, the center may not cook through before the outside becomes too brown. Try rolling or patting your dough to a slightly thinner thickness.
- Oven temperature: It's important to ensure that your oven is properly calibrated and reaching the correct temperature. An oven that runs too hot or too cool can affect the baking time and result in unevenly cooked biscuits.
- Baking sheet placement: The placement of your baking sheet in the oven can also impact how evenly your biscuits cook. Make sure to position it in the center rack for optimal heat distribution.
By making these adjustments, you should be able to achieve biscuits with a more evenly cooked and fluffy center.
What is the difference between Bisquick and flour?
Bisquick is a pre-mixed baking mix that contains flour, shortening, leavening agents, and salt.
It's designed to make baking quick and easy by providing all the necessary dry ingredients in one convenient package.
On the other hand, flour is a single ingredient made from ground grains (usually wheat). It does not contain any added fats or leavening agents.
Flour is used as a base ingredient in many recipes and can be combined with other ingredients to create various baked goods.
The main difference between Bisquick and flour lies in their composition and convenience.
Bisquick already includes shortening (fat) and leavening agents, which eliminates the need for measuring out these ingredients separately.
It's a time-saving option for those who want to streamline their baking process.
How can you make your own Bisquick mix at home?
If you don't have Bisquick on hand or prefer to make your own baking mix, you can easily create a homemade version.
Here's a simple recipe:
Ingredients:
- 6 cups all-purpose flour
- 3 tablespoons baking powder
- 1 tablespoon salt
- 1 cup vegetable shortening
Instructions:
- In a large mixing bowl, whisk together the flour, baking powder, and salt until well combined.
- Add the vegetable shortening and use a pastry cutter or your fingers to cut it into the dry ingredients until the mixture resembles coarse crumbs.
- Transfer the homemade Bisquick mix to an airtight container or resealable bag for storage.
This homemade Bisquick mix can be used as a substitute in any recipe that calls for store-bought Bisquick.
Simply measure out the desired amount and proceed with your recipe as usual.
Can I use Bisquick instead of all-purpose flour?
Bisquick can be used as a substitute for all-purpose flour in certain recipes, but it's important to note that it contains additional ingredients such as shortening and leavening agents.
This means that using Bisquick may alter the texture and flavor of your final dish.
If you're in a pinch and don't have any all-purpose flour on hand, you can use an equal amount of Bisquick as a replacement.
However, keep in mind that this substitution works best in recipes where the additional ingredients in Bisquick won't negatively impact the outcome.
For example, Bisquick can be used in recipes for pancakes, waffles, biscuits, and some quick breads.
These recipes typically call for leavening agents and fats, which are already included in Bisquick.
However, it may not be suitable for recipes that require precise measurements or a specific flour-to-liquid ratio.
Can you substitute water for milk in Bisquick Biscuits?
Yes, it is possible to substitute water for milk in Bisquick Biscuits, although, be aware that the resulting texture and taste may vary slightly.
How runny should I make my biscuit mix so it can come out round and perfect?
When making biscuit dough with Bisquick mix, you want to achieve a consistency that is soft and slightly sticky but still manageable.
The dough should hold its shape when dropped or patted out but not be too dry or crumbly.
If your biscuit dough is too runny or wet, it will spread too much during baking and result in flat biscuits.
On the other hand, if the dough is too dry or stiff, your biscuits may turn out dense and tough.
To achieve the perfect consistency for your biscuit dough:
- Start by following the recipe instructions provided on the Bisquick box or in your chosen recipe.
- Add the liquid (usually milk) gradually while stirring until the dough comes together. You may not need to use all of the liquid called for in the recipe.
- If the dough seems too dry and crumbly, add a little more liquid (a tablespoon at a time) until it reaches the desired consistency.
- If the dough appears too wet and sticky, sprinkle in a small amount of additional Bisquick mix to absorb some of the moisture.
Remember that practice makes perfect when it comes to getting just the right consistency for your biscuit dough.
With time and experience, you'll develop a feel for the dough and be able to adjust as needed.
So there you have it — the secret to achieving perfectly fluffy Bisquick biscuits every time.
By understanding the science behind biscuit-making, using the right ingredients, handling the dough with care, and mastering baking time and temperature, you'll be well on your way to biscuit perfection.
So go ahead, grab your apron, and get ready to enjoy a batch of warm, buttery Bisquick biscuits that will delight your taste buds and warm your soul.