
When we began to look at floorplans after deciding to build our home, the one thing I wanted most was a modern mud room.
With a houseful, we desperately needed a dedicated space for shoes, coats, and bags. Everyone dropping their stuff at just inside the door was just not working for me.
For starters, it's a trip hazard. And, second, it's not exactly making a great first impression for guests when they walk into a pile of bags and shoes.
Basically, I crave organization and, with the shear number of people in our home, it helps keep me sane in the chaos of everything else.
Modern Mud Room
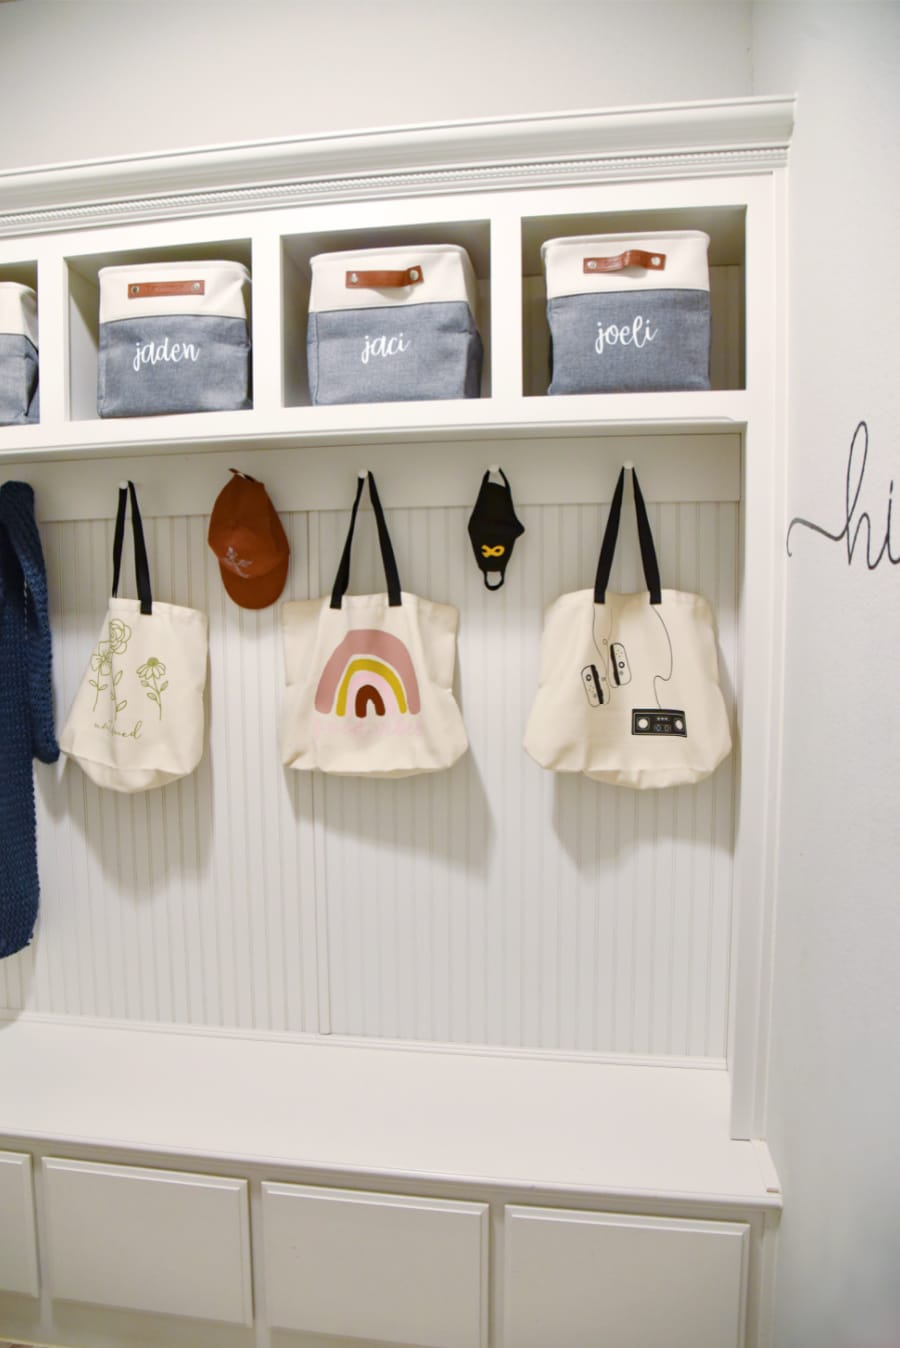
Once we moved into our new home, the mud room was easily one of my favorite places in the house. The builder exclusively crafted our modern mud room based on my design.
In addition to wall hooks for hanging coats and bags, we also made sure there was a mudroom bench for putting on shoes.
As well as drawers for storage under the bench.
Everything served a purpose.
Plus, the large cubbies above the wall hooks and the space above meant for room for storage.
Modern Mudroom Storage
As always, the fun part came in decorating and organizing the simple modern mud room.
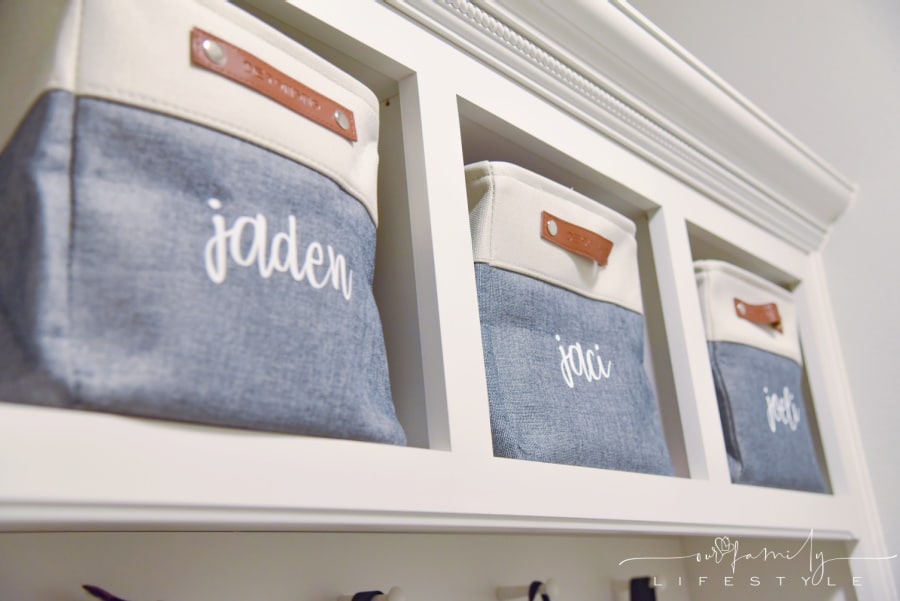
Starting from the top and working my way down, I wanted to add storage containers to the overhead cubbies.
I decided on four canvas baskets that we could use for the mud room cubbies. Each of our kids at home would get one dedicated space and that left room for one "miscellaneous" area.
How to Use Iron-On Vinyl on Canvas Storage Bins
In the Cricut Design Space, I chose a font (Babette) that would be easy to read as well as aesthetically pleasing to the farmhouse look I was after.
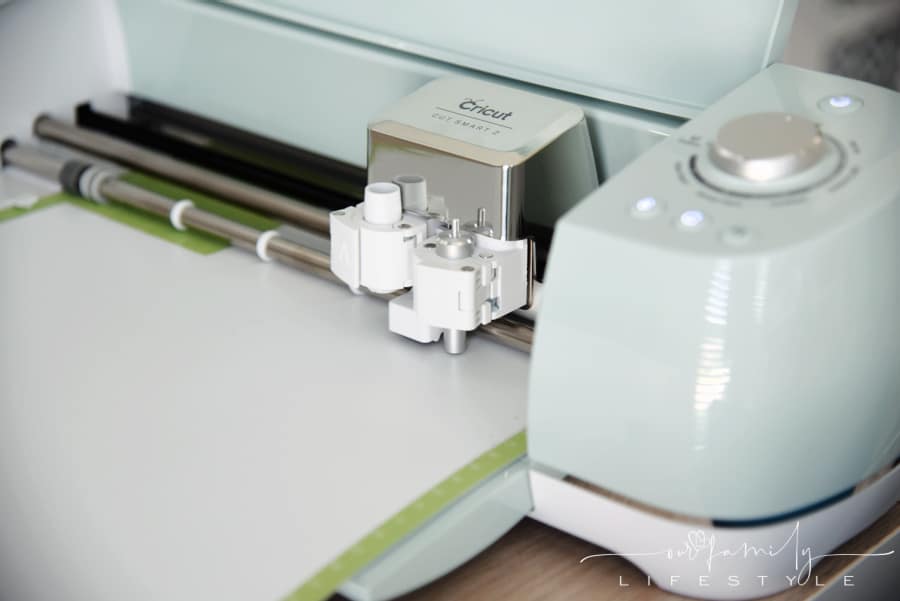
Once I had each of their names ready to cut, I made sure to mirror my text and sent it to my Cricut Explore Air2 loaded with Everyday Iron-On vinyl.
After weeding the design, I preheated my Cricut EasyPress™ 2 and prepared the first storage bin for applying the vinyl.
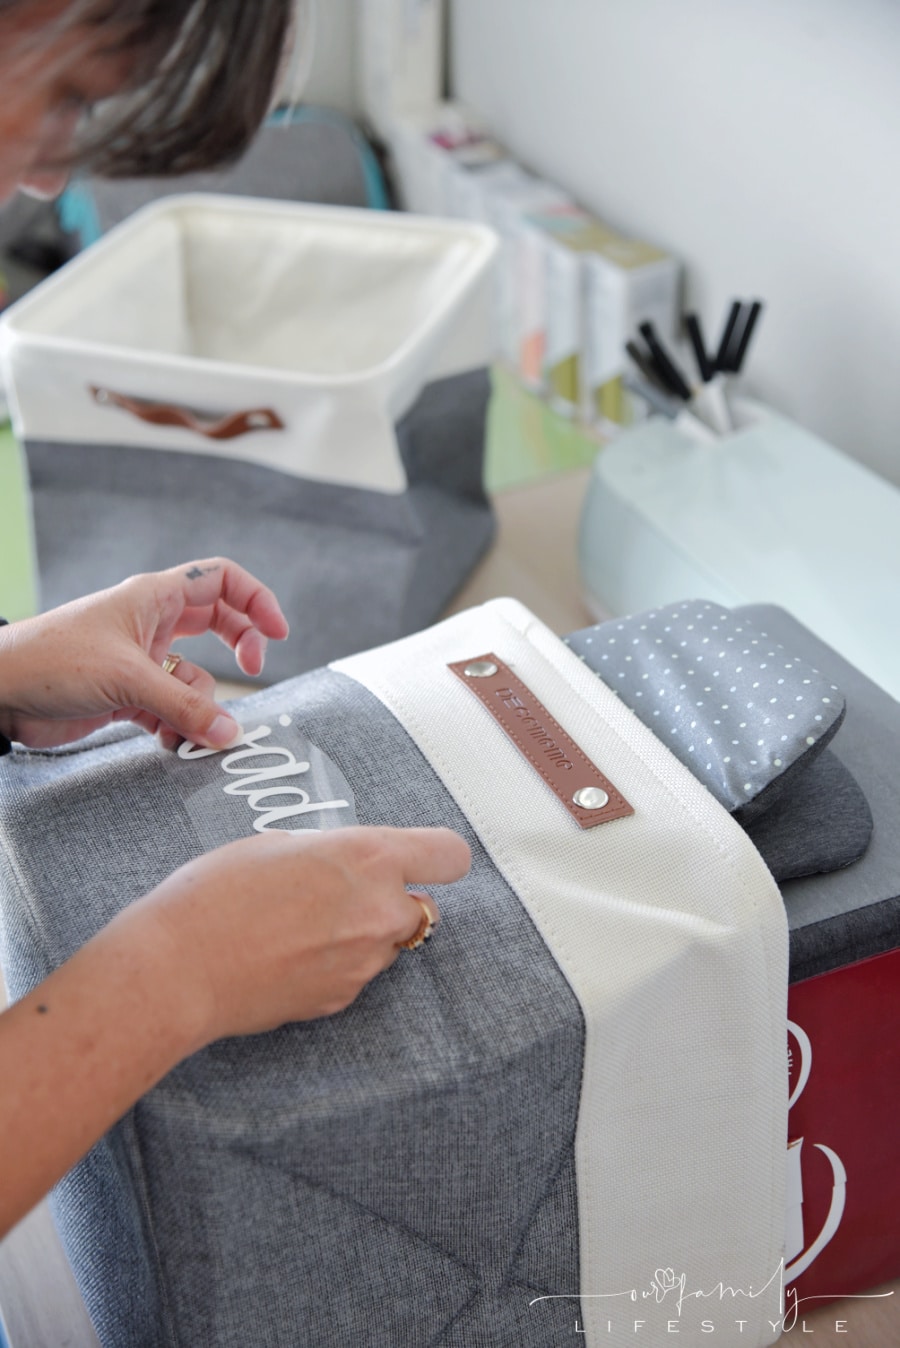
With the cube folded flat, I preheated the area where the vinyl would be applied.

Placing the iron-on flat down, I applied light pressure for 30 seconds. Because the Everyday Iron-on is a cool peel, I waited for it to cool before removing the liner to see my finished product.
Now each space is prominently displayed so there should be no question as to whose space is underneath.
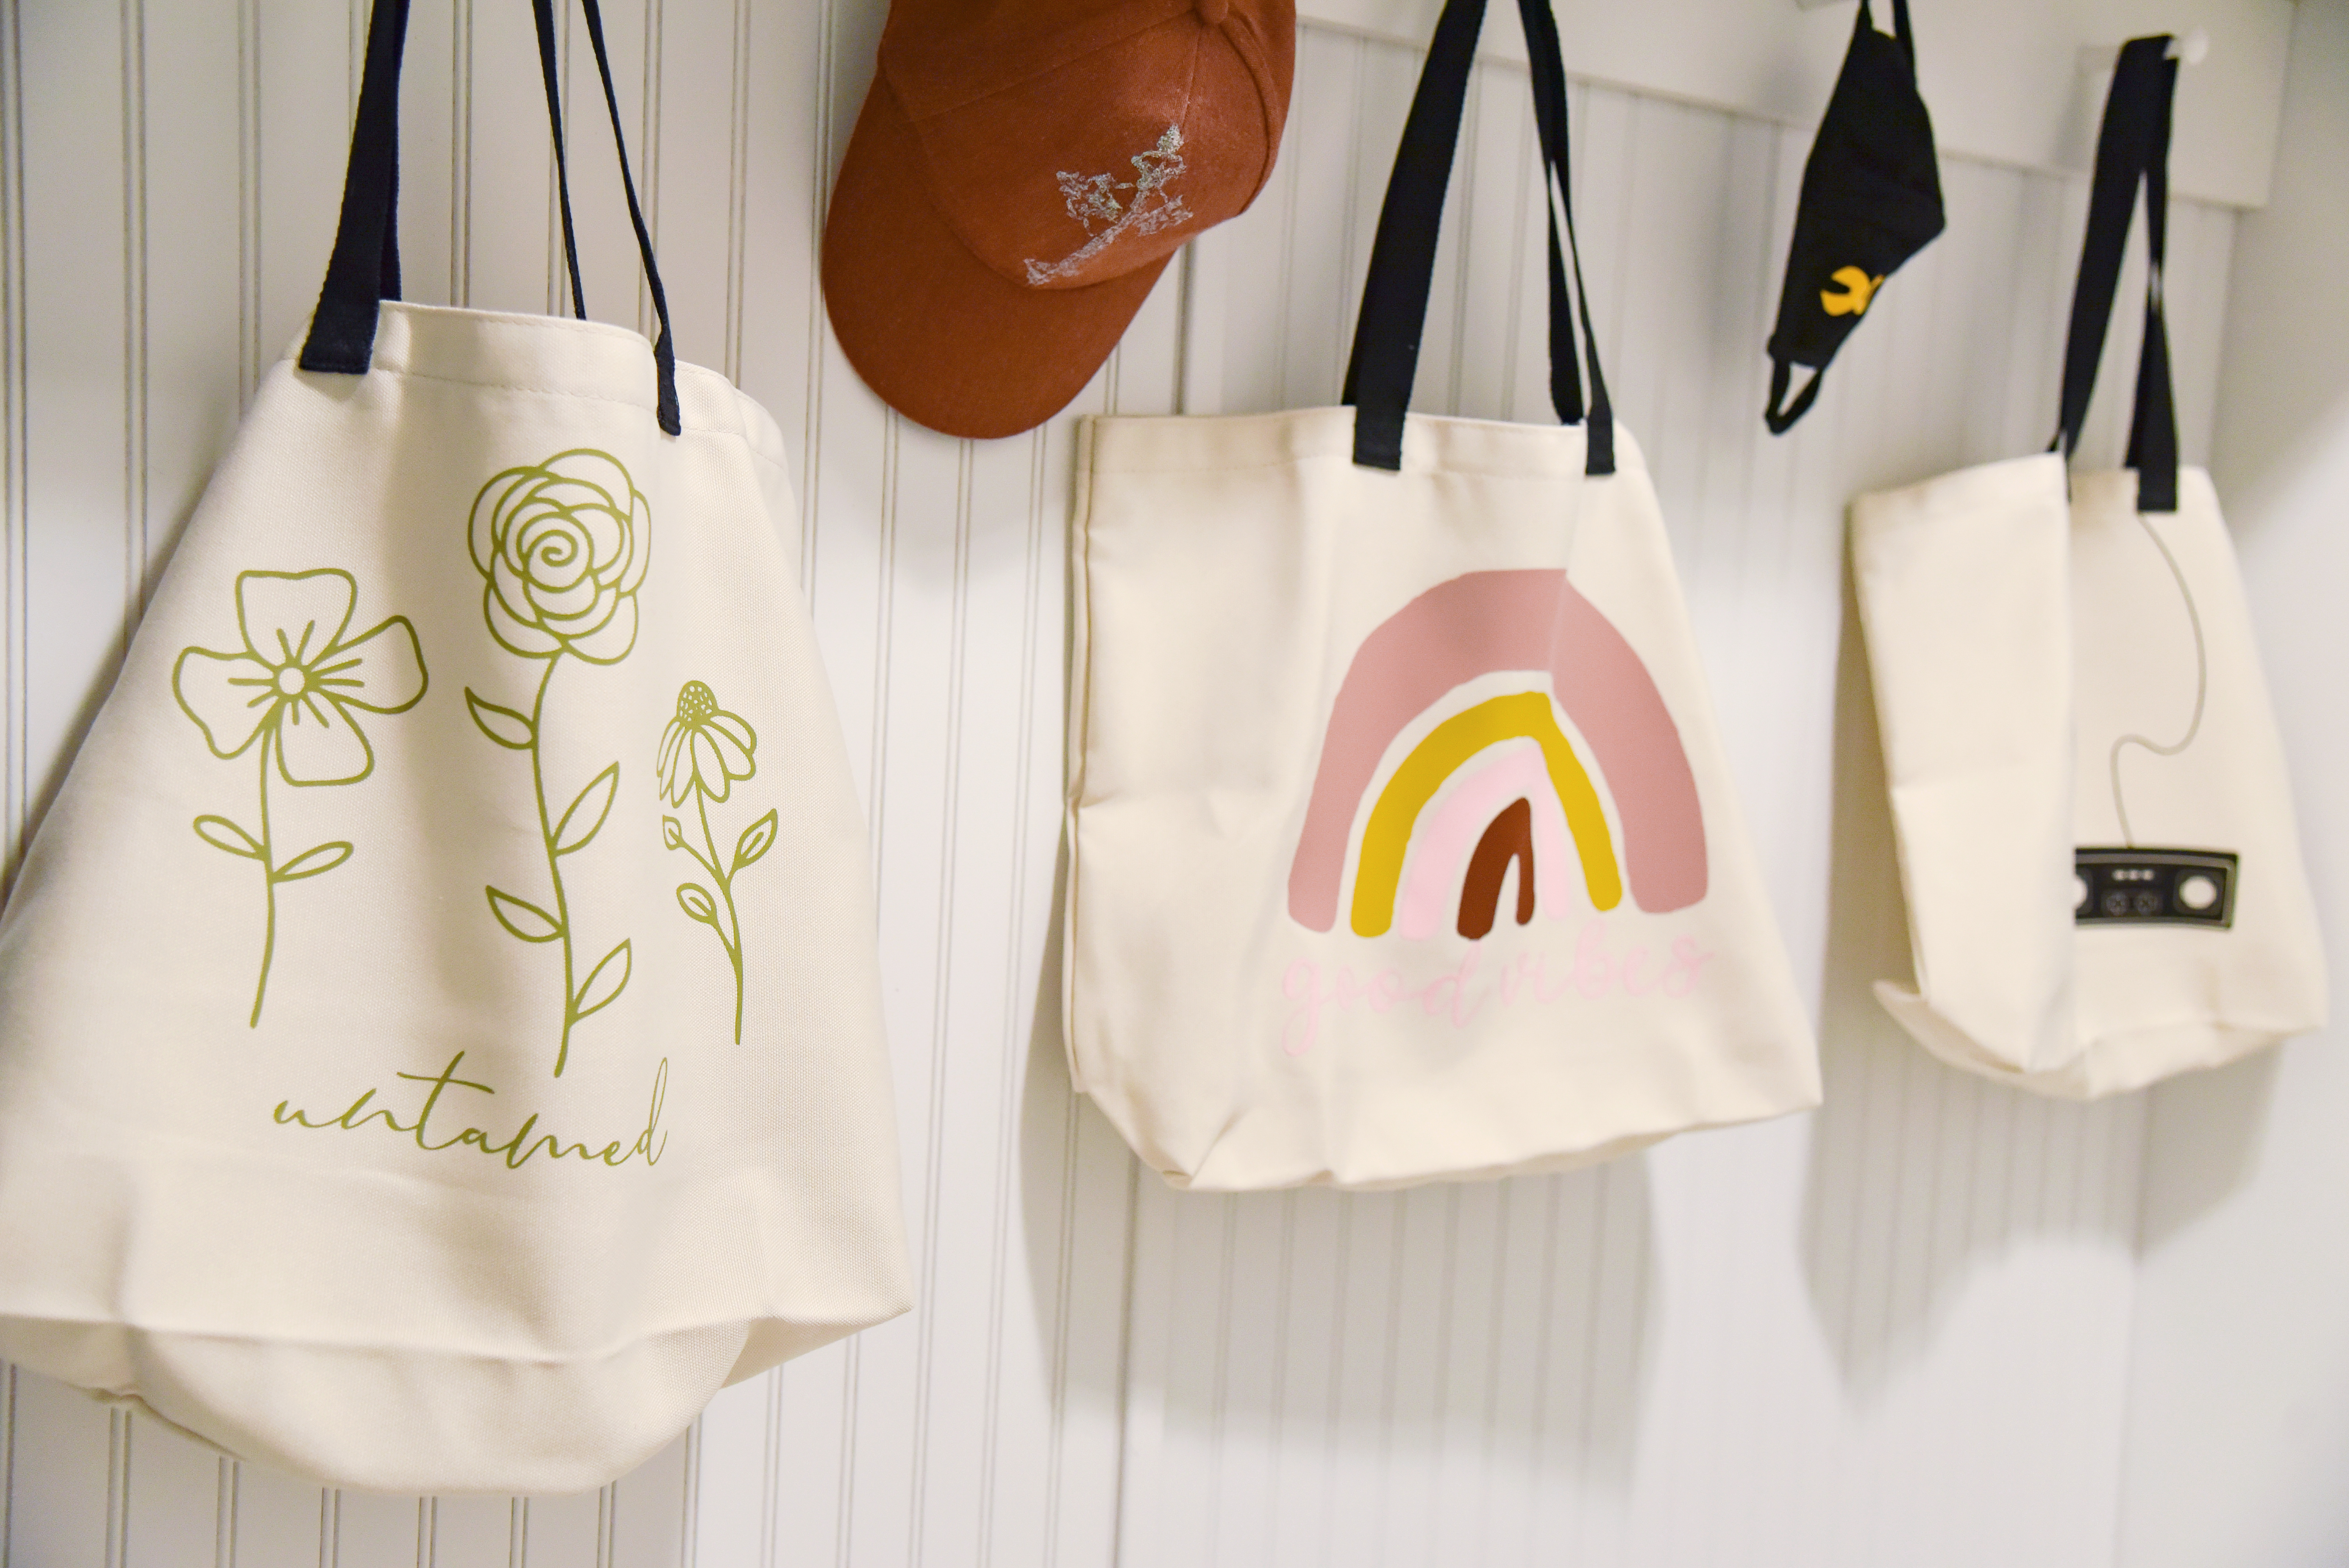
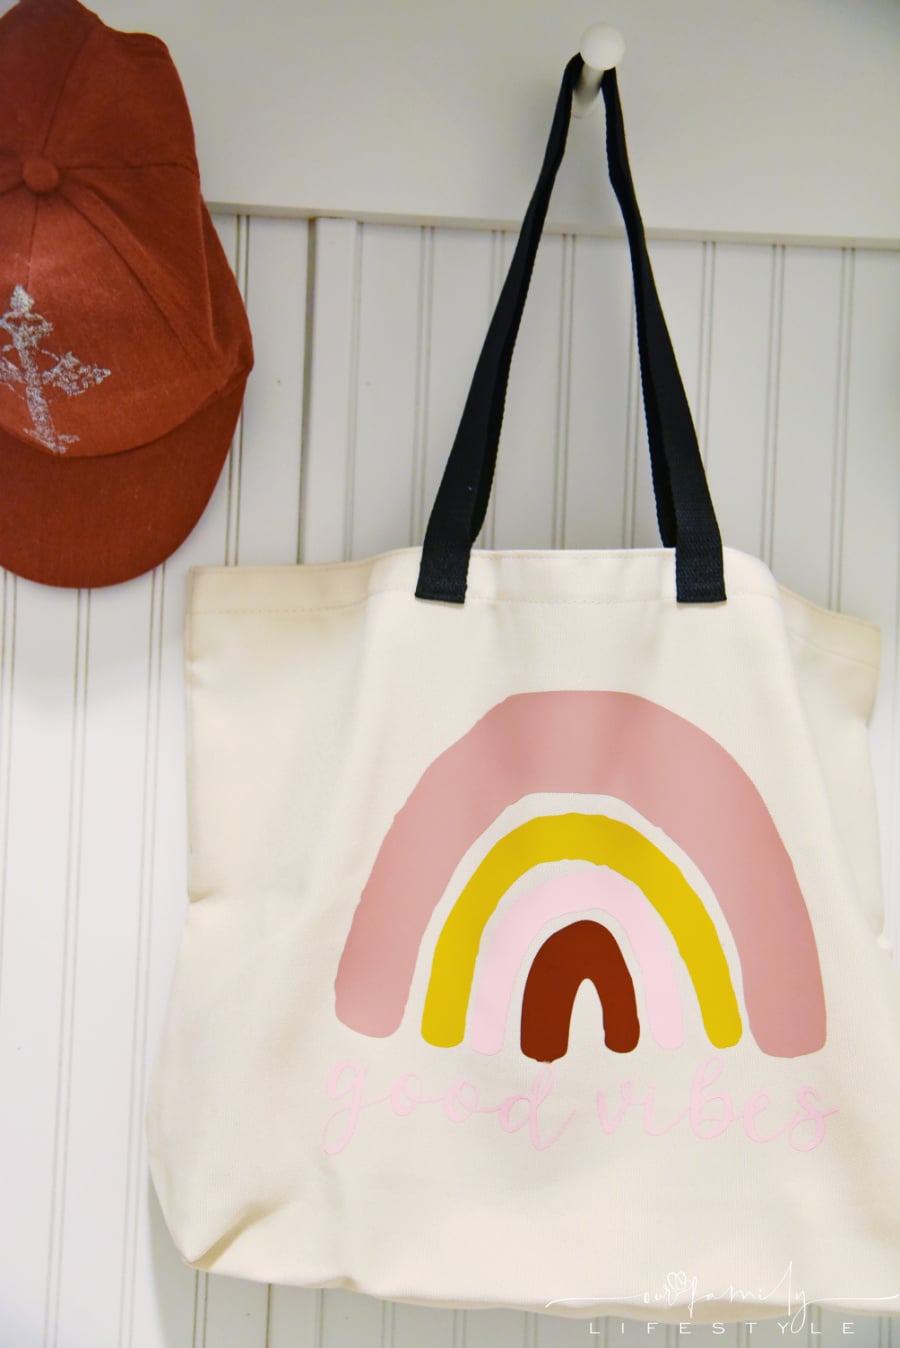
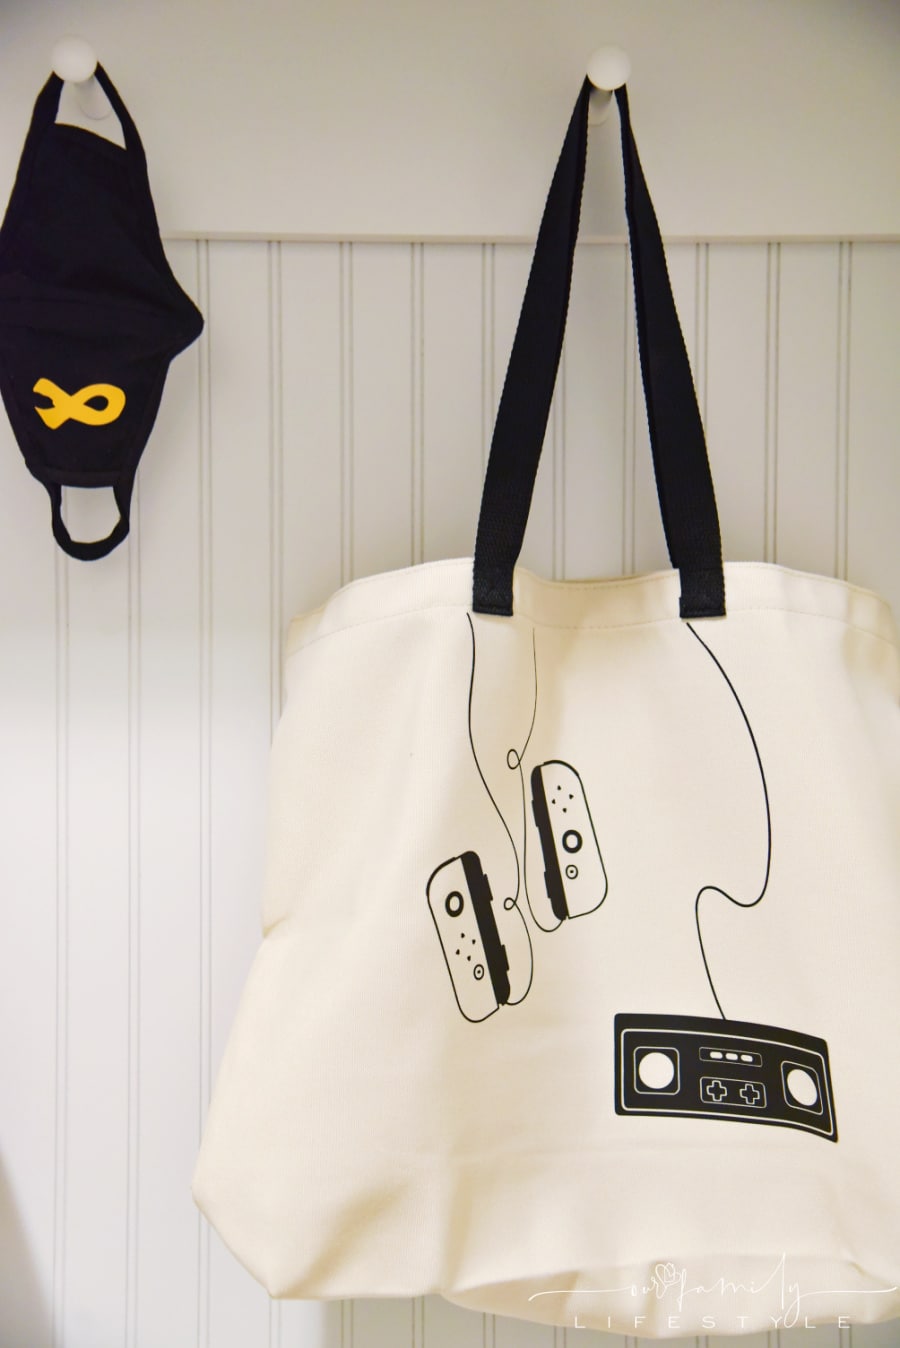
Personalized Tote Bags
For further personalization, I pulled up trendy designs on the Cricut Design Space and asked each child picked to pick one.
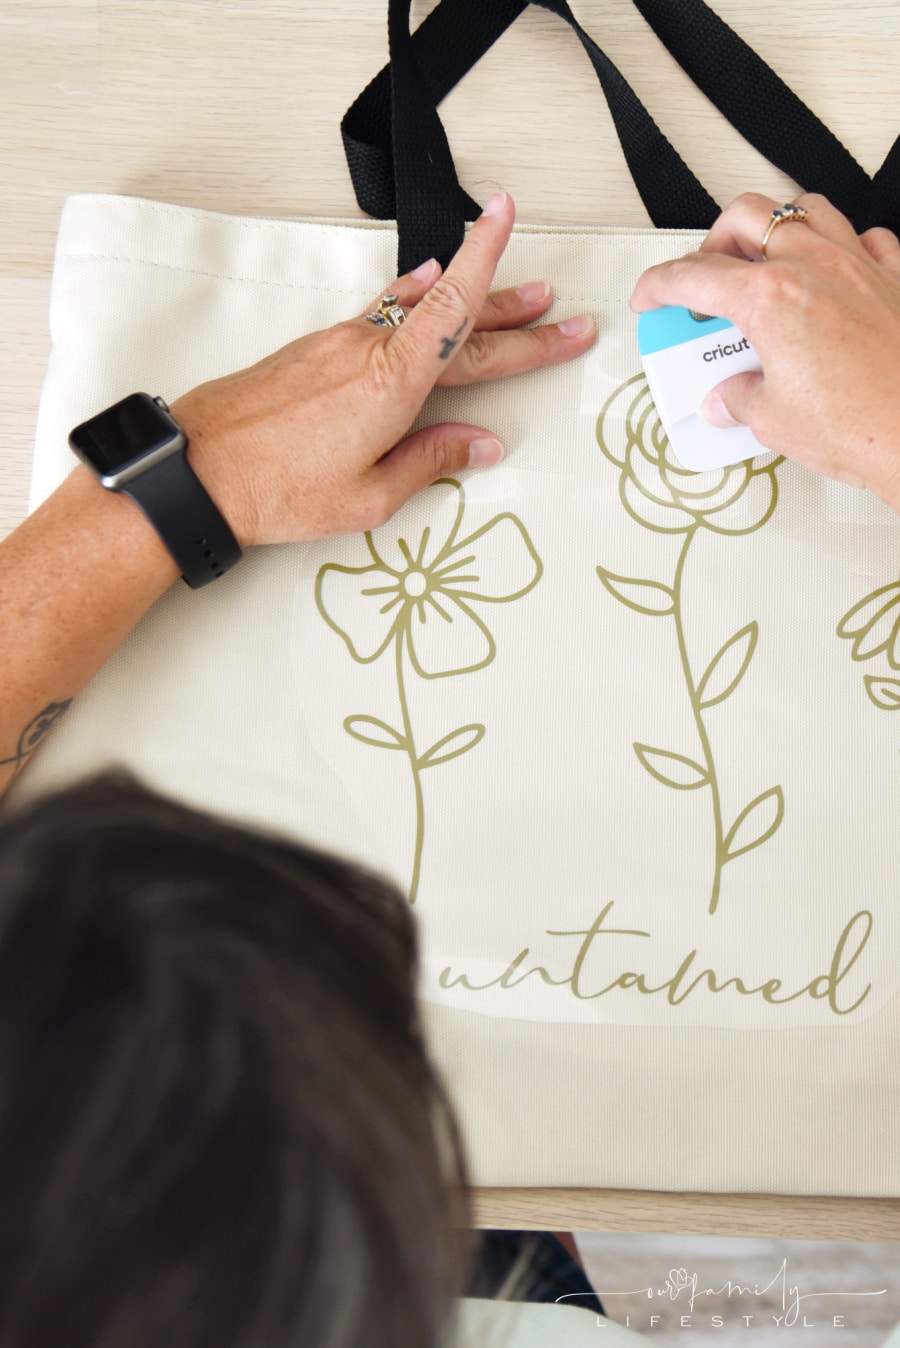
Then, using the same method as we did above for the canvas storage bins, cut, weeded, and applied each design to the Cricut Tote Bags blanks.

Each tote bag could serve a dual purpose based on the owner's needs:
- holding books, wallets, toys or other small items
- carrying as an every day bag upon leaving the house
Our youngest three are all very unique in their own way, so it's their choice, as long as they remember to help keep the space organized.
Removable Vinyl Wall Decal
After asking the kids about what sort of removable vinyl wall decal we should go with, they overwhelming decided on something simple: hi.
At least it was an easy request!
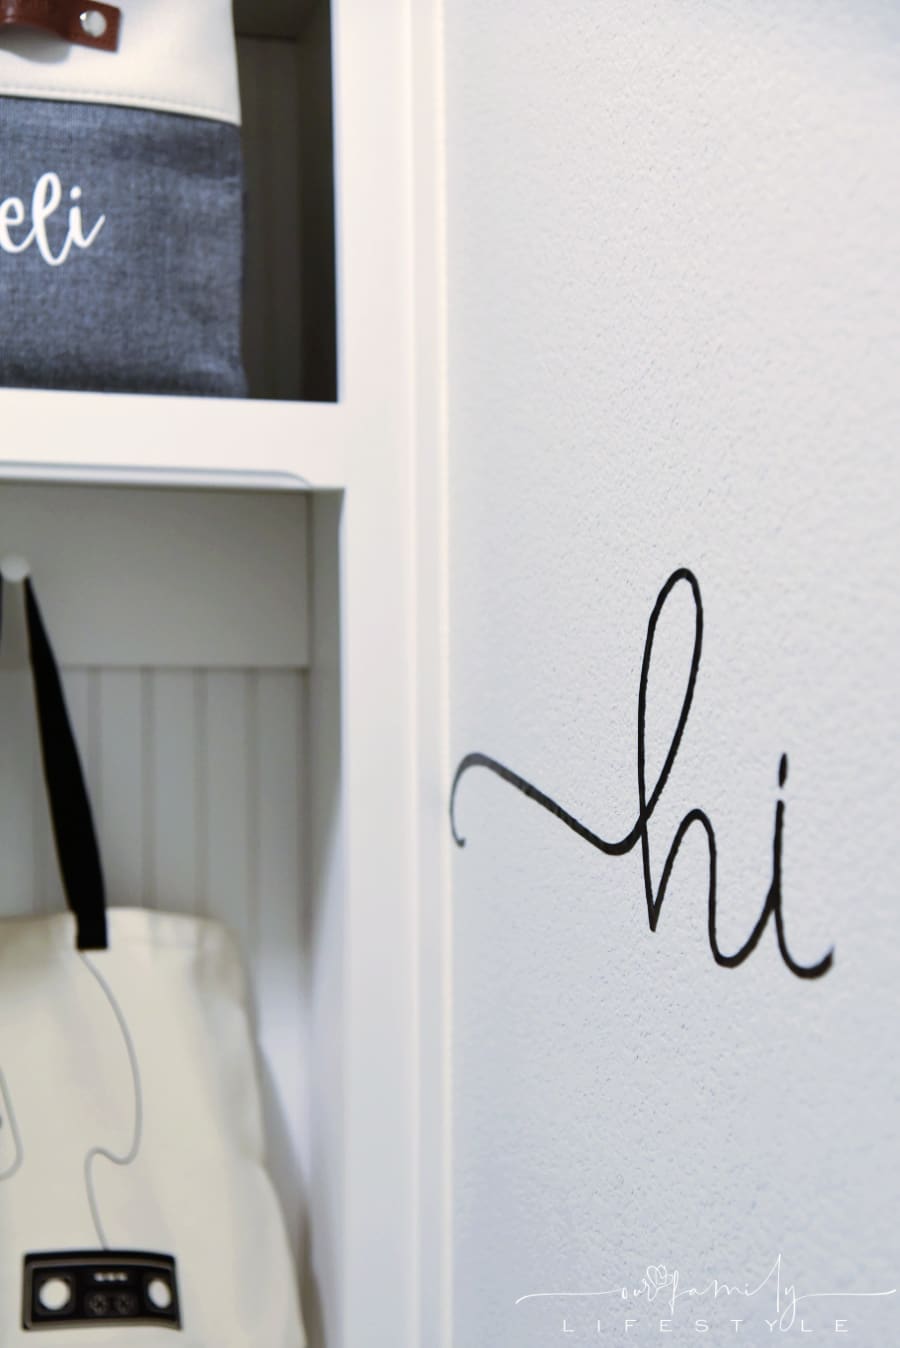
I hopped back onto the Cricut Design Space and was able to manipulate a scripted font in order to elongate the word "hi" into something to better fit the space.
After cutting the Premium Vinyl™ - Removable, and because it was a very manageable size, I simply made sure the wall surface was clean, placed the design, slowly removed the liner, and pressed the text into place.

But, because I wanted to add just a bit more text, I also cut out the words, "stay awhile," to apply to a blank key holder we already had on the wall.
I had good intentions to write fun messages there, but never did. Therefore, it needed something and this was the perfect time to freshen it up.
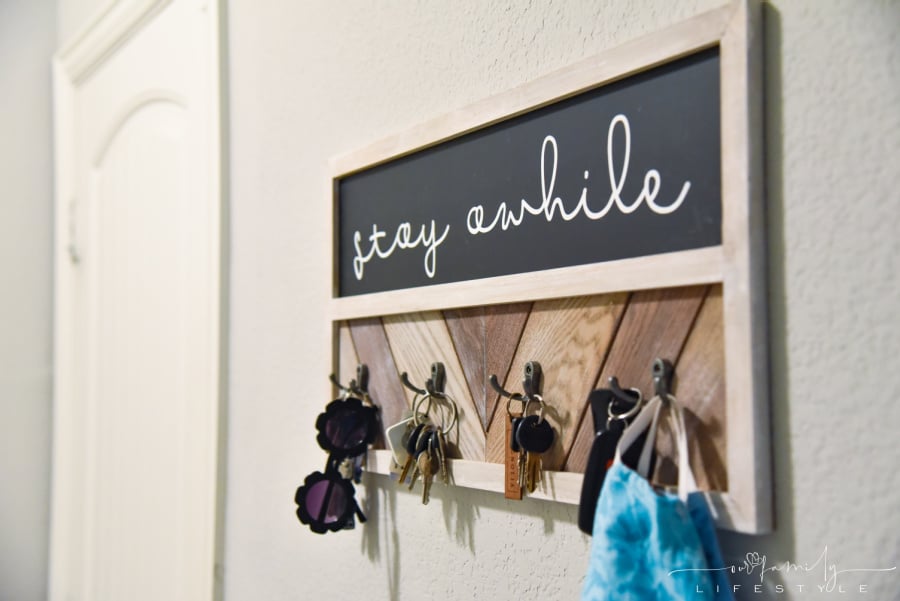
Again, the process is the same as applying the Removable Vinyl to a wall; just a much smaller scale.
It's amazing what a big vision and little vinyl can do to help you create a welcoming modern mud room in your home!
[mv_ad_settings autoInsertStickyVideo="true" chicory="true" desktopAdhesion="false" disableUntil="2021-09-23" embedCode="%3Cdiv%20id=%22mediavine-settings%22%20data-blocklist-content-desktop=%221%22%20data-blocklist-content-mobile=%221%22%20data-blocklist-auto-insert-sticky=%221%22%20data-blocklist-in-image=%221%22%20data-blocklist-chicory=%221%22%20data-blocklist-zergnet=%221%22%20data-expires-at=%222021-09-23%22%3E%3C/div%3E" gumGumInImage="true" id="disable-ads" inContentDesktop="true" inContentMobile="true" leaderboard="false" mobileAdhesion="false" recipe="false" stickySidebar="false" tabletAdhesion="false" topSidebar="false" zergNet="true"]


